Share:
Cheesemaking on vacation? Fun and tasty!
June 17, 2022
Another adventure we enjoyed during our California vacation was the chance to take a cheesemaking class. We spent the morning wandering through the historic town of Sonoma, grabbed a quick sandwich and then drove to the working kitchen on the edge of town. There, we met Ben Sessions, instructor for The Epicurean Connection, a multifaceted culinary company founded by his wife Sheana Davis, an award-winning cheesemaker.
As we waited for the other students to arrive, Ben offered glasses of Rosé wine from a local vineyard. We were joined by a group of three women celebrating a birthday and a newlywed couple on their honeymoon. In short order, we were instructed how to turn on the propane burners at each of three tables, and filled a tall pot with a gallon of milk and half a quart of heavy cream. Nothing low-fat or lite in this recipe for Creme de Ricotta.
During the lull as each team waited for the mixture to reach the target temperature of 200 degrees, Ben shared ideas for using the natural by-product of cheesemaking – whey. After the milk (or milk/cream mixture) has curdled, the resulting cheese curds are lifted from the liquid with a flat, long-handled strainer. The curds are placed in a cheesecloth-lined colander to drain. The liquid that is collected in the bowl beneath the colander and what remains in the pot once the curds are removed is protein-rich whey.
Some large-scale cheese manufacturers offer their whey for sale to use as an ingredient in the production of energy powders and protein drinks. When making cheese at home, always save your whey for a variety of uses. A soak in whey can reduce gamey flavor in meats or increase juiciness in fresh chicken. Cooking foods in whey adds both flavor and nutrition to dishes such as soups, simmered beans, boiled oatmeal and poached fish.
Once we had all hit the magic number of 200 F, we stirred in salt and vinegar to begin the curdling step. As we counted down 10 minutes, Ben invited the students to look through the large collection of dried herbs and spice mixtures to choose flavors to add to our fresh ricotta. Choices ranged from Italian seasoning to lavender sugar to onion, with every other imaginable option from a well-stocked spice rack.
We tested whether or not we had succeeded in making cheese by resting the ladle on the surface of the moist mixture: If it didn’t sink, that meant the cheese curds had formed and were ready to be moved to the colander to drain. Once we had harvested the bulk of the curds, we squeezed out more liquid by folding the cheesecloth tightly around the cheese.
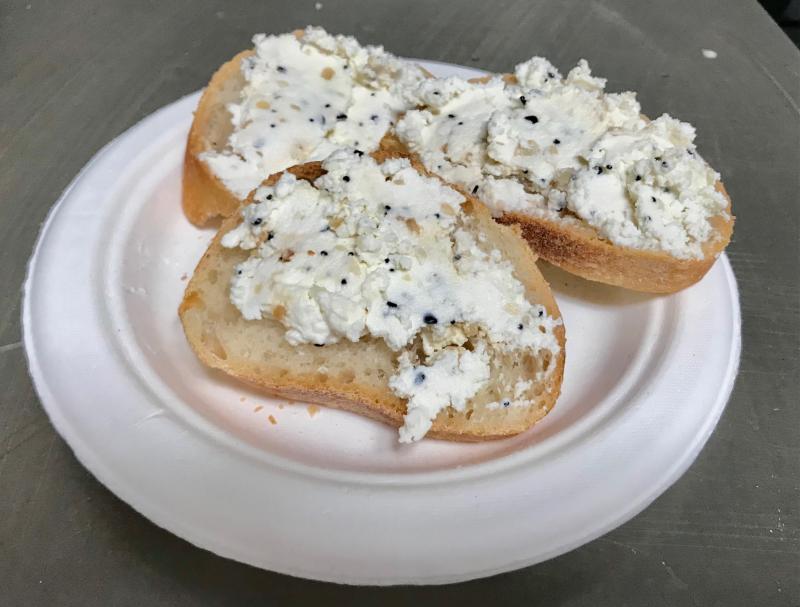
Now we were ready to flavor the ricotta. At our table, we opted for five different combinations: Meyer lemon zest and chives; Meyer lemon zest and fresh pepper; rose sugar; green goddess herbs; and everything but the bagel seasoning (as seen in the photo). If you try this at home, remember to use dried herbs, because the fresh herbs will turn black when mixed into the ricotta.
Ben congratulated the group of newly trained cheesemakers with another glass of wine and encouraged us to try the process again once we were home, sending us off with ladles, cheesecloth and the recipe card. He packed our cheese in boxes with freezer packs and told us to expect the flavors to intensify as the cheese rested in the refrigerator. Ricotta toast for breakfast did not disappoint. For more information, the website is: theepicureanconnection.com.
Creme de Ricotta*
1 gal whole milk
4 C heavy cream
2 C distilled white vinegar
2 t kosher salt
flavorings, if desired
Combine milk and cream in an enamel, glass, cast-iron or copper pan. Heat over medium low until temperature reaches 200 F. Avoid scraping the sides or bottom of the pan. When the mixture reaches 200 F, remove from heat. Add salt and vinegar, stirring once or twice. Cover and allow to rest for 10 minutes; do not disturb the mixture during this time. Line a colander with cheesecloth and set in a bowl large enough to hold it. Remove lid and rest ladle on the contents’ surface. If it does not sink, begin removing the cheese curds, scooping from the center to the sides of the pot. Transfer curds to the lined colander and continue ladling. Allow the curds to drain, folding them into the cheesecloth and carefully pressing out the liquid. After about 30 minutes, the cheese is ready to serve plain with fruit, or mixed with dried herbs or seasoning blends on crackers. Cheese will keep in the refrigerator for up to a week. *Adapted from The Epicurean Connection, recipe by Sheana Davis.


