How to get started with sous vide cooking
Once considered the secret weapon of restaurant chefs and television cook-off competitions, the technique known as sous vide has become an option for the home cook. Pronounced “sue-veed” and roughly translated as “under vacuum,” this process entails sealing food in plastic and cooking it at a meticulously maintained temperature in a circulating water bath.
You may recall Food Network contestants dropping plastic packets of meat or fish into what resembled a wringer-washing-machine tub. In short order, the protein was cooked to the perfect degree of doneness and ready to be plated. How exactly does this work?
In traditional methods of sautéing, braising or roasting, you don’t have complete control over the heat distribution and temperature. Often, foods will end up overdone on the exterior and underdone on the interior. Using sous vide, the water bath is held at a specific and consistent temperature for whatever is cooking.
Not only is the food cooked to the ideal serving temperature, it is kept at that constant temperature, so it won’t be overcooked. The result is a tender piece of steak or chicken that retains its moist, juicy texture while cooking thoroughly. As you can imagine, this is a boon for the busy restaurant chef who has a wide range of proteins on the menu.
Chefs can pre-cook any number of steaks, chops or filets of fish that will be ready to serve when an order arrives at the kitchen.
Originally, this technique required bulky and expensive machines that didn’t make sense for a home cook. Over the past 10 years, smaller versions were marketed, but many of these were still too large to fit on your kitchen counter.
In addition, some versions required multiple components to separately control the temperature and to circulate the water. Now, the technology has become affordable and convenient, as we recently discovered. Visiting with our friends Pat and Marie last week, we had the chance to learn just how easy it is to cook sous vide at home.
Marie filled a large, tall soup pot with water and placed it on the stove (but didn’t turn on the burner). She immersed what looked like a stick blender into the water and attached it to the side of the pot. Next, she initiated an app on her smartphone that asked what she was cooking (salmon filet), how thick were the pieces (one-inch) and then displayed the temperature and time required.
With one tap, the app on her phone then communicated wirelessly with the device in the pot, instructing it to start heating and circulating the water. Marie vacuum-sealed the salmon in plastic pouches using an electric sealer she’s had on hand for years of freezing fresh vegetables and cuts of beef.
After a few minutes, the phone beeped, signaling it was time to add the fish to the pot; Marie submerged the bags and clipped them to the pot.
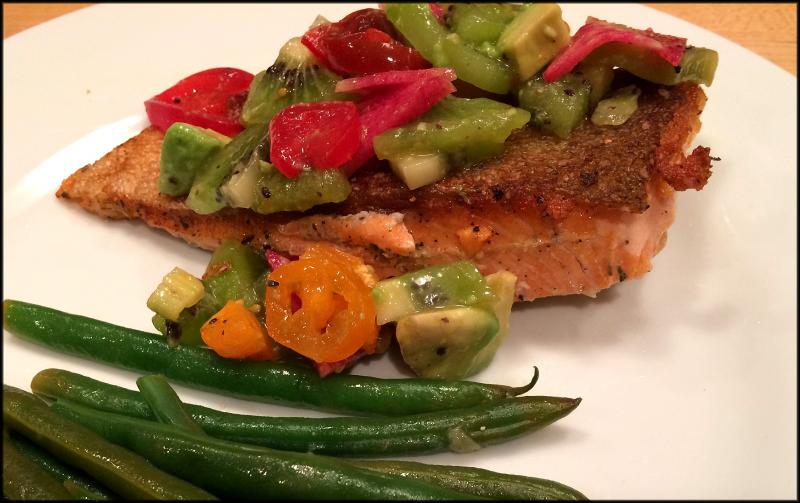
With another tap, her phone became a timer, beeping when the salmon was ready. Because Marie and Pat (and their cats) love crispy salmon skin, she added another step: briefly searing the salmon (skin-side down) in a skillet before plating the filets with a tropical salsa and lemon-steamed green beans (see photo).
The tool isn’t always infallible, however. Before we went to bed that evening, we vacuum sealed bacon strips and placed them in the water bath after the app on the phone advised the bacon would be cooked to perfection in 8 hours. The next morning, the bacon was far from ready and the app had added another 6 hours to the cooking time. Marie finished the bacon stovetop.
Once we returned home, I started looking online at tools and supplies for a sous vide system. I found several sealers for under $100 and immersion controllers between $150 and $200.Marie recommended against using either a hand-pump sealer or commercial zip-top bags, neither of which is as effective as the machine sealers.
And, she suggests sticking with tradition: use a skillet for breakfast bacon.
If you’re ready to try sous vide, I’ve included a basic salmon recipe. If you’d prefer to stick with your oven, here’s a recipe for baked salmon. Both of these do well paired with mango salsa.
Baked Salmon
1 lb salmon filet
1 garlic clove
1/2 t salt
1/2 t white pepper
1 T sesame seeds
Preheat the oven to 400 F. Line a baking sheet with parchment paper. Cut the salmon into 4 evenly sized pieces and place on the baking sheet skin-side down. Peel the garlic clove and grate over the salmon using a microplane. Sprinkle with salt, pepper and sesame seeds. Bake until cooked through, about 12 to 15 minutes. Yield: 4 servings.
Sous Vide Salmon
1 lb 1-inch-thick salmon filet
salt and pepper
1 lemon
fresh dill sprigs
1 T olive oil
Set the circulating water bath to 122 F (or use smartphone app settings as directed for one-inch-thick salmon filets). Cut the salmon into 4 evenly sized pieces. Sprinkle with salt and pepper and place two pieces in a plastic-sealer bag compatible with your sealing machine.
Cut lemon into thin slices and arrange on flesh side of salmon; top with dill sprigs and seal. Repeat with two remaining filets. When water bath has reached 122 F, submerge sealed bags into the pot, clipping them to the side to ensure they stay immersed. Cook for 40 minutes or as directed by the app.
Heat olive oil in a skillet over high. Remove filets from bags, discarding lemon and dill. Place filets in the skillet, skin-side down and cook for about 30 seconds to crisp the skin. Yield: 4 servings.
Mango Salsa
1 diced mango
1/2 C diced red onion
1 diced avocado
2 T minced cilantro
1 T olive oil
juice of 1 lime
pinch red pepper flakes
salt & pepper, to taste
Combine all the ingredients in a bowl and toss to combine. Yield: 2 C salsa.


